Welcome to the Uru - Path of the Shell Walkthrough
Uru - Ages Beyond Myst Walkthrough | To D'ni Walkthrough | Linking Books
Welcome to the Path of the Shell walkthrough. Like all walkthroughs, use it to help but take the time to explore yourself, you will discover much more on your journey than what is detailed here.
And unlike the To D'ni Expansion Pack, this game takes you to new locations with one short excursion back to an old friend. But I digress, your start point will be the right hand book in your library on Relto which links you to the Watcher's Sanctuary.
Watchers Sanctuary | Er'Cana | Ahnonay | The Path of the Shell | The Final Steps
The Watcher's Sanctuary
When you arrive in the Watcher's Sanctuary there is a hologram of a grid in front of you. Take a note of this grid, you will need it later:

To the left of the hologram is an alcove with two linking books and a journal. You need to read the Journal as it has some important clues for later.
Off to the right is a balcony that overlooks the Great Tree. Up to the left is a suspension bridge. This bridge is at the end of the path of the shell and is going to take a lot of work to get to. Hanging over the balcony is a tunic you can add to your wardrobe. Turn around and on the wall to the left of the balcony is a label with the number 1:38.
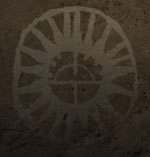
At the top of the stairs is a mezzanine floor. There is a button in the alcove which opens a door to a clockwork room. In the corner is a lever that illuminates a shell image on the floor. On the wall is a label with the number 1:4. You can roll the ball down the track if you like - but it won't get you anywhere. Close the lever to open the door and walk round the upper level to see another label on the wall: 1:89.
From the journal you should have noted that the sanctuary was the province of Kadish until he died. You can still see his skeleton in the Vault on Kadish Tolesa. He did a lot of work on two ages: Er'Cana and Ahnonay. Ahnonay appears to have time traveling properties which should be fun if you can get there.
You can visit the two ages in either order, it makes no difference. I chose Er'Cana first (the book on the left of the alcove).
Er'Cana
Er'Cana Canyon
You arrive in a tunnel. Go to the right and at the end of the tunnel is a pool. On the wall is another grid that you need to note:

Follow the tunnel back the other way and you will arrive in a canyon, worn smooth over the years by the passage of water (or maybe it was written that way...). There are some rail tracks above you that you really should investigate.
If you go to the left and follow the tracks round to the right you end up at a chasm. If you follow the track back the other way you end up at the entrance to a factory of some sort. Go to the other set of tracks and follow them all the way to the other end of the canyon. You can walk a good part of the way on the top of the ridge, which is fun. The other end of the canyon is blocked but there is a train you can take.
Climb up the ladder and go to the controls in the middle. Push up the central handle and pull the right hand lever. Enjoy the ride. When you arrive, go to the very front of the train and pull the lever. The truck separates and trundles into the factory.
The Factory
 Go
onto the catwalk and touch the shell cloth on the left. Walk round to the
back of the building and climb the stairs. Outside you can see some water
tanks and a huge windmill. The catwalk here is broken but seems to be intact
on the other side. Return to the gloom and climb down the ladder.
Go
onto the catwalk and touch the shell cloth on the left. Walk round to the
back of the building and climb the stairs. Outside you can see some water
tanks and a huge windmill. The catwalk here is broken but seems to be intact
on the other side. Return to the gloom and climb down the ladder.
There is only one way out from the lower level and this is blocked by the bottom of the truck. Return to the truck and pull the lever but make sure you get off before the truck begins to move. Back down the ladder and into the tunnel. On the right, just before you climb down the next ladder, is a switch. Pull it up to turn on some lights. Down the ladder and along the tunnel. Underneath the fourth light is another label: 4:96.
At the far end, climb the ladder and pull up the switch to turn on the lights. This part of the complex is similar to the part you arrived in. Climb the ladder to the upper level and exit using the stairs. Go round to the right and behind the wall is another label: 4:81. Follow the catwalk into the next building. Inside is a generator similar to that in Yeesha's home in the Cleft. There are 4 exits from this room. The doorways to the left and right lead to water outfalls. The doorway opposite leads to a control room. The other exit leads back the way you came in.
Pull
up the switch to the right of the control room exit and the generator starts
up. There is a shell cloth to the left of the control room exit. Up the
stairs to the control room and out the other side. There are 4 massive tanks
with rotating mixers. If you wander over to the tanks you can see that they
are partially filled with water and there is an outlet pipe. There is also
a ladder leading down with a sealed hatch at the top. The catwalk leading
to the far end of the complex is broken. Wish the DRC would get around to
fixing things!
Go back to the generator room and take the exit on the left. Walk to the second outfall pipe and note that the debris guard is damaged. Climb inside and walk to the far end. The way out is blocked but it may be worth investigating later.
Go out the exit on the other side of the Generator Room. On the far wall is another label: 4:52. If you jump into the outflow pipe nearest the windmill, you can see a Relto page just on the other side of the debris guard.
Return to the control room. On the right is a projected image of the whole complex:

You can see the 4 mixing tanks and the outlet pipes. If you can shut down the mixers you may be able to get through the broken debris guard to the far tanks and from there to the other end of the complex. Note that there is no power to the far end of the complex yet. Turn round and go sit in the chair opposite. The blue buttons scroll the image of the complex right and left. Press the left button until you can see the 4 mixing tanks. 4 buttons appear. Press each button and 3 icons appear on the right of the screen. Touch these icons to turn off the mixers, open the hatch and drain the water. The number 1 tank doesn't drain but not to worry.
Press the left blue button again. 4 more buttons appear. Each one activates an icon on the right that turns a yellow segment on or off. Turn them all off for now.
Take the stairs leading up out of the control room and climb down the ladder into the left-hand mixing tank. Walk down the outlet pipe and at the end is a Relto page that adds fire marbles to your hut.
Return to the control room and go back to the generator room. Take the left exit and go to the far outflow pipe. Jump inside and walk to the other end. The door is now open so climb the ladder and make your way into the next building.
Making Things
On the right is a switch. Pull it up to get some juice flowing. Step down into the room and note the 4 machines.
On the far side of the room is an exit with a broken bridge. Over the other side you can see a shell cloth that would be nice to get to. On your right is another label: 4:10. Back into the room now and on the central rail is a blue button that operates an elevator. If you didn't turn off the yellow segments then you will go up and come back down again.
When you get to the top, exit through either doorway. At the end of the catwalk is a magnificent view of the mountains. You will also find a neat little rucksack.
Climb
down the ladder into a short corridor. Turn right and touch the shell cloth
on the wall. Now pick up the broken lump of concrete and shove it along
to form a bridge so you can get back to the machine room. Turn around and
walk to the room at the far end. This room is the purpose of the whole factory
- not going to tell you what it produces yet.
Your next task is to get the 4 machines working. Climb back up the ladder and take the elevator down. Return to the control room and turn on the 4 yellow segments. All the way back to the machine room and there should now be a red lamp on each machine. If you look through the viewscreen you can see a set of 3 sliders and a button on the right. Note the symbols at the bottom of each slider. The 4 machines seem to be connected to the 4 mixing tanks so I reckon that they are mixing units. All you need are the settings for the sliders.
Go to the room at the end of tunnel. On the right of the central device is a Linking Book and a Bahro Stone. Use the Bahro Stone to link to a double chamber. You arrive in the upper level. There is yet another label on the wall (5:18) and three drawings. Note the symbol in the center of each and the number of spokes:


Return
to the factory via Relto and the Er'Cana shell cloth. Go to the Linking
Book in the end room and touch the page. This time you will arrive in a
very grubby chamber. There is a device on the edge of the floor with a receptacle
that looks much like that in the room you have just linked from. If you
climb the ladder there is a label on the wall: 3:110.
Use the Linking Book on the lower level to return to the factory and go to the mixing units. Set the sliders in each one to 40, 30, 20. When you have set the last slider, the button will turn yellow. Press it and a timer will start to count down. You can wait around here for a while or wander off for a look see. After about 15 minutes, return to the room with the Linking Book. If there is blue light all should be OK. If not then you need to wait some more.
Press the blue button and the machine opens up. It appears that you have made 6 pellets. Press the blue button and one of the pellets will be delivered to the receptacle in front of you. Touch the pellet and the Linking Book and you will be transported to the chamber. Note that if you wait too long after touching the pellet, it will be disappear into the bowels of the machine.
When you arrive in the chamber, the pellet drops into the device and the meter records the level of energy. If it is full it will drop down and dissolve giving off a bright white light. If not then there is just a soggy splosh.
So, you have made some pellets. What do you need them for? We shall now find out...
Return to Relto and link back to the Watchers Sanctuary. This time link out to Ahnonay using the book of the right of the alcove.
AHNONAY
Ahnonay Gallery
You arrive in a small circular room with a single exit. Through the door is a gallery with familiar symbols on the walls. At the end of the gallery is a Linking Book that will take you to Ahnonay. The wall on the left has a label: 2:18. Link to Ahnonay.
Water Ahnonay
You
arrive on one end of a horseshoe shaped island with a lagoon in the center
The island itself is surrounded by a number of other islands and there seems
to be a very strong current in the water. As you walk round the island you
pass a number of long rock formations. On the third of these is a shell
cloth on the corner and round the back is a slope that leads up to some
stepping stones. Note the square tower on the little island.
Continue round the island to the opposite end of the horseshoe where there is a pedestal with a linking book that will take you back to the Ahnonay Gallery.
In the center of the lagoon is a tower with a number of blue segments . These segments relate to the position of all the creatures on the island. Recalling the notes in the journal in the Watchers Sanctuary that Ahnonay could move in time - you need to find some way to time travel. The solution is to kick all the crabs off the island and then link back to the Ahnonay Gallery.
To get the crabs off the island, you need to walk towards each one and herd them into the central pool.
Once you have got rid of all the crabs, there should only be one blue segment on the tower - and that's you. If there is more than 1 segment lit, then you need to go find the crab. It is likely to be sitting on the island with the square tower.
Go to the stepping stones at the top of the slope and jump out into the water. Swim as fast as you can (running mode) at an angle away from the island and you will be carried by the current to the tower. If you miss, you will be carried back into the lagoon for another go.
When you get to the tower, walk around the underwater ledge and note the label round the back: 3:72. Up the stairs and note the doorway that you can't open. Walk all the way round to another grid:

Jump off the tower, drift into the lagoon and make your way to the pedestal. Link back to the Ahnonay Gallery and from there back to Ahnonay.
Crystal Ahnonay
Things have changed a bit. The water has gone and instead of crabs there are blue crystals all over the place. Your job this time is to get rid of all the crystals.
You
will need to get to the tower so return to the slope you used in Water Ahnonay
to get to the stepping stones. This time, walk down into the mist and along
the causeway to the tower. At the top of the stairs is a shell cloth.
When you have shattered all the crystals, walk (or run) to the pedestal and link back to the Ahnonay Gallery and from there to Ahnonay.
Future Ahnonay
Hold your breath, because you are floating in space. There is nothing here except for some scrubby grass.
You should by now have worked out that clearing the island of creatures and crystals allows you to travel through time.
If you link out using the pedestal and back in using the book in the Ahnonay Gallery, you move on to the next age.
If you link directly to Relto and use the Ahnonay linking book, you will arrive back on the same age you left.
If you link in from Relto using the shell cloth you will arrive at the location of the shell cloth you last touched. This could be in the previous age.
You can cycle through the three ages (water, crystal and future Ahnonay) all day long if you wish. But recall from the stained glass window in the gallery that there are four circles which would indicate 4 different ages. We shall come to that later.
Inside the Tower
The
only places you haven't got to so far is the inside of the towers on Water
Ahnonay and Crystal Ahnonay. While still in Future Ahnonay, work your way
around to a promontory that overlooks the square tower island (albeit bereft
of tower). There is a shell cloth on the stump that, if it were in the Water
Ahnonay and Crystal Ahnonay, would be inside the tower.
Going to check the Crystal Ahnonay tower first. Touch the cloth and return to the pedestal. Link back to the Ahnonay Gallery and from there to Crystal Ahnonay. Note the label 3.66.
What we need to do now is use what we have to get inside the Water Ahnonay Tower. There are 4 moves you need to do to get there:
Recall that you touched the shell cloth on the tower island on Crystal Ahnonay. Link back to Relto and use the Cloth Marker in the Ahnonay book to link to Future Ahnonay tower island. Touch the shell cloth.
Link back to Relto and from there to Future Ahnonay using the Ahnonay linking book (not the Cloth Marker).
Walk to the pedestal and link back to the Ahnonay Gallery and from there to Water Ahnonay.
Link to Relto and use the shell cloth in the Ahnonay book to link to the inside of the Tower in Water Ahnonay.
Inside the tower are three controls and some ladders you can use to look out of the windows. With your back to the door, turn the wheel to the right of the round window. This will turn off the water currents. The control on the left of the round window initiates a lot of clunking and grinding and turns on the red light above the door. When the light goes out, open the door using the handle.
Exit the tower and jump into the water. With the current off you can now swim to the islands. I shall let you discover their secret. Round the back of one of the islands is the label 2:32. You need to end up at the island with the long branch sticking out the top. Round the back of the island is a tunnel leading to a dock. Climb out of the dock and follow the tunnel round to a large door. There is a control on the left of the door.
Continue
round to the other side of the dock and touch the shell cloth. Walk back
to the door and lift the handle. There is a clunking and grinding again.
If there wasn't, you need to swim back to the tower and lift the handle
again since the tower handle powers the door handle.
Ahnonay Control Room
Link to Relto and back to Ahnonay using the shell cloth. If all has gone OK you should be in the fourth age (it's painted on the wall) but no shell cloth. On the right, just before the doorway is a label: 2:30. Go through the doorway to the control handle. Activate the handle again and after all the bumping and grinding has finished, the door will open.
Walk
down the gantry and examine the image at the far end. Apparently the statue
is Kadish. Lots of building work going on. Walk back a little way and climb
down the ladder. There is a shell cloth on the wall and a chair. Sit down
and disappear into the depths.
There are two controls on the chair. The left one spins you around and the right one sends you on your way. Go forwards three times and pull the lever above your head. When you emerge from the tunnel, walk forwards to the bed on the right. There is a nifty jacket for your wardrobe and a label on the wall: 5:57
Turn round and examine the control unit. Recognize the symbols? They were on the walls of the Ahnonay Gallery. All you need to do is press the symbols in the same order they appear in the Ahnonay Gallery. If you are really stuck, link back to the Kadish Gallery in Ae'Gura. On the upper balcony you will see the same symbols.
If you are still confused, this is the correct order:

When the door opens, enter the chamber. On the left is a button that opens the windows. All should become clear now - you can see the 4 hemispheres that house the 4 ages of Ahnonay and the track you used to get here.
Touch
the shell cloth on the wall and link out using the Bahro Stone on the central
table. You end up in a Bahro cave below the one you visited in Er'cana.
There are some squares on the wall but not the grid you have become used to seeing. There is also a label: 5:32. Link back to Relto. You can visit the missing Ahnonay age if you use the Ahnonay linking book. Whatever you do decide to do, link back to the observation room using the shell cloth. Go to the shelves and examine the parchment:

The Bahro chamber is shaped like an hourglass. There is the number 625 written on the left with a sort of egg timer design round it. Now examine the timer unit. Flick the little lever and it begins to tick. I timed it at just under 15 minutes.
The Bahro Cavern
Remember those pellets you made in Er'cana? When they fell into the water they dissolved and lit up the room. If you drop them through the hole in the upper chamber, after 15 minutes they will fall through to the lower chamber and illuminate the chamber.
Link back to Relto and return to the Er'cana factory via the shell cloth. Press the button to get a pellet, touch it and the Bahro stone and you will see it drop through the hole. I went back and got a couple of more pellets so that I would have plenty of light.
You can relax now as you have got 15 minutes to wait. At your leisure, link back to Relto, then to Ahnonay (using the shell cloth) and from there to the lower Bahro chamber. Get yourself in a good position to see the squares on the wall and wait.
After 625 Uru seconds, the pellet will drop through and splash into the pool. The white light will illuminate the walls and you can see the grid:

Since you only have a few moments of light, use your Ki to take a picture. There are a bunch of cave paintings as well that, if you had time, would be nice to look at.
The Path of the Shell
Return now to Relto. Remember all those labels you have been collecting? Take a look at the blue books on your right-hand bookcase. They are numbered 1 to 5. The labels refer to a book and line number. So, 1:4 means book 1 line 4 which is: 'The door lies at the end of the path'. So get your counting finger out and read those books!
This is what I got:
1:4 - The door lies at the end of the path.
1:38 - The passing of time gives the path to the gathered.
1:89 - Be still and the path will be made known.
2:18 - The action of the gathered means nothing.
2:30 - Darkness makes the righteous humble and the evil bold.
2:32 - Seek the path of the shell.
3:72 - Take time to understand the path of the shell.
3:110 - The path of the stone is toil for the gathered.
4:10 - The number of the watcher is six hundred and twenty five.
4:52 - The way is made clear at the end of time.
4:81 - The future is always revealed to those who wait.
4:96 - Rest in the light.
5:18 - The gathered will find rest when the light comes.
5:32 - Roll the stone to know the deceiver.
5:57 - The path is folly for those who toil.
It seems that you have to stand in the light without moving for 625 Uru seconds. Remember the light in the clock room in the Watcher's Sanctuary? It illuminated a shell symbol on the floor...
Link to the Watchers Sanctuary. Up the stairs and into the clock room. Go to the lever in the corner and turn on the light. Since you are standing on the shell already, don't move!
Eventually (about 15 minutes later) you will hear a metallic noise and a ladder emerges from the wall.
Climb the ladder and walk round to the end of the ledge (you will see why it is a folly to follow the path of the stone). Press the button at the end and cross the bridge.
Follow
the stairs down and exit into the tree chamber. Across the suspension bridge
and into the tree. On the wall is a shell cloth and another grid:

On the back wall is a switch that turns off the lights. After you have admired the night sky, turn the lights back on. Since this game is called the Path of the Shell, go to the entrance to the tree and follow the spiral path to the center of the tree. Make sure you are not standing on the spiral before you begin.
If you have followed the path of the shell, you will link to a familiar location. If you don't know where you are then do not worry. Press the red button on the left and the door will open and you can exit into the library. All that remains is the map of the island and a rather fetching red tunic.
Back into the fireplace and press the red button. Examine the grey panel at the bottom of the wall. Pressing on it depresses the surface. Remember all those grids you have been collecting? The squares on the grids relate to depressions on the grey panel. All you need to do is press the panel to replicate the positions of the squares on the 5 grids:

When you have done, press the red button and the fireplace will spin round. There is a linking book that will take you to K'veer. Listen to Yeesha's message. She transports you to Ae'gura and brightens the whole place up. On your return to K'veer, walk to Atrus's desk and pick up his tunic. Read the letter and add the Relto page to your book. This one adds a bit of greenery to the place. You can mooch around for a bit but in the end the only place to go is Relto.
The Final Steps
The journey is nearly over but there are a few things to do to tidy things up.
Kadish
From your Relto, link to the Kadish vault. This should be the last Journey Cloth you touched in Kadish Tolesa. If not, you will have to make your way to the vault. Inside, stand at the top of the stairs looking down and turn left. Go forwards and there will be a linking book that will take you to a different version of the vault.
The vault is devoid of the treasures and Kadish himself. What there is however is a helmet on top of the sacks, some butterflies and a torn up letter written by Yeesha. Seems she has some rather supernatural powers that she used to save old Kadish.
Climb the stairs and walk round the upper balcony. There is a Relto page that will add the butterflies to your Relto.
Myst Relto Page
From your Relto, Link back to Myst using the book on the shelf. Get out your old Myst notes and program the grey panel to match the original settings:

Press the red button and spin around. The Relto page will add a fireplace to your hut.
Ahnonay Relto Page
Whilst experimenting with the time-warp tango I discovered that there is a dock in each of the Ahnonay ages, and that is how I found the Relto page.
Begin in Water Ahnonay. Swim to the dock and touch the shell cloth. Swim back to the island and link to the Ahnonay gallery using the pedestal.
Link to Crystal Ahnonay island from the gallery. Link to Relto. Link to the Crystal Ahnonay dock using the shell cloth marker in the Ahnonay book. If you look over to the other side of the dock you can see a Relto page on the door. Walk round, discover the door is locked and touch the shell cloth.
Link to Relto. Link to Crystal Ahnonay island. Link to the Ahnonay gallery using the pedestal. Link to Future Ahnonay island.
Link to Relto. Link to the Future Ahnonay dock using the shell cloth marker. Go through the door and touch the shell cloth. This will put you on the dock side of the door in Crystal Ahnonay.
Link to Relto. Link to Future Ahnonay island. Link to the Ahnonay gallery using the pedestal. Link to Water Ahnonay from the gallery. Link to the Ahnonay gallery using the pedestal. Link to Crystal Ahnonay island.
Link to Relto. Link to the Crystal Ahnonay dock using the shell cloth marker. Walk to the door and collect the Relto page.
You are now the proud owner of a D'ni clock.
And that is about it. For now...
Obduction Scratches MystMyst II: Riven Myst III: Exile Myst IV: Revelation Myst V: End of Ages Uru - Ages Beyond Myst Uru - To D'ni Uru - Path of the Shell Dark Fall - The Journal Dark Fall - Light's Out Rhem Rhem 2 - The Cave Rhem 3 - The Secret Library Reah Schizm Riddle of the Sphinx The Omega Stone Amerzone Zork - Nemesis Zork Grand Inquisitor Hype - Time Quest
If you have found this walkthrough useful, discovered an error or have a suggestion then let me know: feedback.
![]()
