Welcome to the Uru - To D'ni Walkthrough
Great Zero Markers | Linking Books | Uru - Ages Beyond Myst Walkthrough | Path of the Shell Walkthrough
The Uru - To D'ni expansion pack begins in your Relto. You can leap straight in but a bit of preparation will make things easier later on. Note also that you must have completed Uru - Ages Beyond Myst before playing the expansion pack.
Preparing the Way | Relto | Bevin | Ferry Terminal | Teledahn | The Spy Room | Kirel | Great Zero Antechamber | Calibration
Preparing the way
To make things a bit easier later on in the game, it is worth preparing the way by locating a number of Bahro stones. When you use a Bahro stone, a new page will be added to the linking books in your Relto. Makes traveling around much easier. The ones you need to find are located as follows:
Kadish Tolesa. In a niche to the left of the platform that had the linking cloth on the right. This one links you to a balcony overlooking the canyon in Ae'gura.
Gahreesen. In a chair to the side of the conference room - the one without the Journey Cloth. This one links you to a balcony overlooking Tokotah in Ae'gura.
Eder Gira. The large rock near the waterfall. This one links to the Tokotah roof in Ae'gura.
Eder Kemo. In the second garden, behind the floating obelisk. This one links to a rooftop in the Bevin Neighbourhood.
Relto
On your bookshelf you will see the following books:
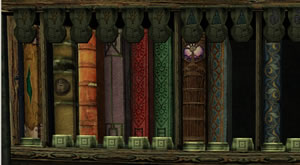
Cleft, Gahreesen, Teledahn, Kadish Tolesa, Eder Kemo, Eder Gira, Ae'gura and the Bevin Neighbourhood.
If you have installed the Path of the Shell then you will also have a linking book for the Restoration Guild on the right beneath the shell symbol.
In each book as you turn the pages you will see links the Journey Cloth (where appropriate) and locations you have visited so far. Open the Bevin book and link to the plaza.
Bevin
![]() In
the centre of the Plaza is a fountain. Turn about and climb up to the balcony
overlooking the inland sea. It's the same one you fell into after jumping
into the void from the Bahro cave. Take a look through the telescope at
a city on the far side. Back down to the plaza. There are four exits. From
the left they are:
In
the centre of the Plaza is a fountain. Turn about and climb up to the balcony
overlooking the inland sea. It's the same one you fell into after jumping
into the void from the Bahro cave. Take a look through the telescope at
a city on the far side. Back down to the plaza. There are four exits. From
the left they are:
A staircase leading down to the Garden of Lights
Stairs leading up to a walkway.
Stairs leading up to a walkway on the left and a balcony on the right
Stairs leading up to a balcony.
Go down to the Garden of Lights. On the far side, over on the right is a stone with a flat top. Jump onto the rock and you should see a sliver of white on the right of the left-hand window. It is a page that adds islands to your Relto.
Jump down and go back to the plaza. Go up the stairs on the left to the walkway. On the left hand balustrade are three buttons which turn on the lights in the garden. At the far end is another plaza. On your immediate left are some stairs leading back down to the Garden of Lights. There are two doors on the left, one is locked and the other leads to a classroom. On the right of the plaza is another door that leads to a linking book. Put your hand in the slot on the dais to program your Ki. Do not link out yet as there is more to explore. Leave the room through the other door and go to the stairs on the right of the walkway. At the bottom of these stairs is a waterfall and a pathway leading back to the Garden of Lights.
Return to the arrival plaza and climb the stairs to the balcony. Go through the doorway and into the community room. Press the button on the dais to hear somebody speaking in D'ni.
Make your way back to the linking book and touch the image to link your Nexus. Not only will you link to Nexus but a new book will appear in your library as well.
Go to the Ki slot and shove your hand inside. The screen lights up and you will see two locations listed already: Bevin and the Ferry Terminal. As you visit various locations the list will grow.
If you click on the location you want and press the yellow button that slides forwards, the machine will rumble away for a few moments and a linking will open on your left. Since you are already in Bevin, it seems logical to head off to the Ferry Terminal.
Ae'gura - Ferry Terminal.
You arrive facing the harbour. Turn to your left to see a dais with a Ki slot and a linking book back to Nexus. Turn to the right and walk to the end of the central dock. On your right is a small doorway leading to the main docks. All of the ships are sunk but you can walk to the far end just for the hell of it. Return to the central dock and climb the stairs up to an observation point where there is a DRC tent. The Great Stairs leading up to the city are blocked at the moment.
Back down and round to the left and into a small corridor with a broken gate. The gate at the other end of the corridor is locked but you can see more of the docks on the other side. Down on your left is a Bahro Stone that links to a new area in Teledahn.
Teledahn and Relto
You arrive on a small platform. With your back to the rock, look up to your left to see the exit from the slave caves. Down on your right is a page that that adds a wooden platform to your Relto.
Link back to your Relto. You can jump onto the islands if you want. Examine your bookshelves and note the Nexus book. The rest of your time here is going to be spent linking in and out all over the place searching out information. You can do it yourself or allow me to guide you through the maze. Open the Ae'gura book and link to the Barons office.
Ae'gura - Barons Office and the Spy room
Go to the desk and read the '04 journal. Note the coordinates that Zandi has provided: 2175, 58, -81. If you read on you will learn about the spy room accessible via the slave caves, Phil's Relto and that B = blue, O = orange and G = green.
Time to find the spy room. You next move depends very much on how you last left the slave caves since need to get to the outer cave - the one with the control levers. Which means you need to have left the outer gate open and opened the walkway all the way back to the solar generator.
If you are not sure that all is well then read on. If you are confident that all is okay then jump the next paragraph.
Return to the Teledahn arrival hut. Climb down the ladders and make your way to the slave caves. Note the positions of the levers in the outer room and place weights on the pressure plates that correspond to the 'up' panels as detailed on the diagram in Douglas Shaper's office. This will open the inner gates. Exit the cave and flip one of the levers to open the outer gate. Walk down to the drawbridge and pull the lever to allow it to fully open. Keep going to the dock, through the door, up the stairs and through the tunnel. When you get to the end of metal walkway do not jump down! Instead, jump up and it will fall down allowing you to return along the path later.
From the solar generator make your way through the dock and up the stairs to the slave caves. Flip one of the levers and the outer gate will close. A niche should now appear outside the gate.
Link back to your Relto and back to Teledahn. If you are lucky, the journey cloth marker will still be set for the docks. In any case, follow the paths back to the slave caves and enter the linking book.
When you will arrive in the spy room, there is a telescope, two linking books and a hat you can add to your wardrobe.
If you look through the telescope you will see a room with a chart. The chart has the name Bob O'Goobo and a drawing of a location with three coloured blobs, Blue, orange and green:

Recall the note in Douglas's diary: B = blue, O = orange and G = green?
Zoom out and examine the linking books. One book takes you back to the Douglas's office and the other to Phil's Relto. Link to this Relto. Only one linking book is available, use it to link to the Kirel Neighbourhood.
Kirel Neighbourhood and the Bahro Stones
![]() Kirel
is a mirror image of the Bevin Neighbourhood. The stairs on the right go
down to the garden of lights. The stairs next to them lead up to a walkway
overlooking the garden of lights. At the end of the walkway is a plaza with
doors leading to the Nexus linking book and the school room. The other door
is locked. Open the door to the Nexus linking book and program your Ki.
Do not link to Nexus. Go back along the walkway to the three buttons: blue,
orange and green. Translating the name on the chart you saw in the spy room
press the buttons on the order: blue, orange, blue, orange, green, orange,
orange, blue, orange. Return to the plaza and the locked door will now be
open. Inside are five alcoves each with a Bahro stone.
Kirel
is a mirror image of the Bevin Neighbourhood. The stairs on the right go
down to the garden of lights. The stairs next to them lead up to a walkway
overlooking the garden of lights. At the end of the walkway is a plaza with
doors leading to the Nexus linking book and the school room. The other door
is locked. Open the door to the Nexus linking book and program your Ki.
Do not link to Nexus. Go back along the walkway to the three buttons: blue,
orange and green. Translating the name on the chart you saw in the spy room
press the buttons on the order: blue, orange, blue, orange, green, orange,
orange, blue, orange. Return to the plaza and the locked door will now be
open. Inside are five alcoves each with a Bahro stone.
Each stone will take you to a new location in Ae'gura. The 5 stones are:

You need to visit each location and program your Ki by putting your hand in the slot. This will add the links to your Nexus and the Ae'gura linking book. It will also remove all the barriers giving you full access to the city. While you are in the city, it is worth exploring a bit. If you get to the main plaza there is a DRC tent and a very useful map of the city:

After you have visited each location, return to Kirel via the Nexus linking book. Leave the Great Zero Antechamber until last.
The Great Zero Antechamber and Markers
When you get to the Great Zero Antechamber read Douglas's notebook. Look through the window to see the Great Zero Courtyard and put your hand in the Ki slot. Five pale green segments will appear and a light will begin to flash red. This tells you that a Great Zero Marker (GZM) is nearby. It is not that difficult to see. Click on the GZM and one of the segments turns dark green.
You need to find four more GZMs, they are all located in Ae'gura, Bevin and Kirel. The locations of all the GZMs with (images) are listed here.
When you have found five GZMs and lit the green segments, return to the Great Zero Antechamber via the Ae'gura linking book. Put your hand in the Ki slot to upload the markers. The five green segments disappear and you get 15 pale red segments. Guess what your next task is! You also get a link in your Nexus to the Great Zero Courtyard (labeled Rezeero)
Some of the markers are easy to get to and you will be able to get 15 by just wandering around. But it's much more fun getting the awkward ones.
When you have got all 15 segments lit, link back to the Great Zero Observation and upload the markers. This will unlock the doors leading to the Great Zero Calibration Chamber.
Calibrating the Great Zero
Link to the Great Zero Courtyard via the Rezeero link in Nexus. At the bottom of the stairs is the Great Zero. Go down the stairs and round to the right, on the ground behind the stanchion is a page that adds an imager to your Relto and plays all the images saved on your Ki.
Walk to the glass doors at the other end of the courtyard and through to the Great Zero Calibration centre In the calibration centre there are 4 Great Zero Maintenance Units (GZMU). Three of the GZMUs have an engraving matching the three symbols on your Ki. There are a number of translations as to their meaning but I refer to them as: direction, distance and elevation. The fourth GZMU will allow you to calibrate and turn on the Great Zero itself. This GZMU will only become active when you have calibrated the other three.
The calibration of each GZMU comprises three stages: activation, location and calibration.
When you click on a GZMU, you will program your Ki and see the coordinates of the Calibration Great Zero Marker (CGZM). Click on the button in the centre of the symbol and it will begin to pulse telling you that the CGZM is active. Note that you can only calibrate one GZMU at a time.
If you really can't face wandering around for hours and hours, here are the locations of the first three CGZMs:
Direction. Coordinates: 59863, 57, -77. Location: the balcony overlooking the canyon.
Distance. Coordinates: 61131, 71, -84. Location: the Kadish Tolesa Gallery
Elevation. Coordinates: 60143, 1001, -70. Location: the rooftop in Bevin.
Once you have got each marker, you need to the return to the Great Zero Calibration centre and press the button again to calibrate the GZMU.
As you calibrate each GZMU, you will see the coordinates appear on your Ki. When you have all three, go to the forth GZMU, press the button to activate the marker and return to Ae'gura. The last CGZM is hanging in space behind the library. Use your Ki to get close and you will see the marker down below. If you are really careful you can activate the marker without leaping into space.
Return once more to the Great Zero Calibration centre and press the button on the GZMU to complete the calibration.
A beam of light appears heading back to the Great Zero. Wander back to see it rotating with what appears to be a laser beam emerging from the upper part.
This is where you can now use the coordinates Zandi sent to Douglas. Link back to Ae'gura (via Relto or Nexus) and go to the main plaza. Look at your Ki and note the coordinates. You need to move to get them as close as possible to 2175, 58, -81. It turns out that this is at the end of the Tokotah alley. If you wait for a while the Great Zero laser will sweep round and an image is drawn in the air at the end of the alley. Leap into the image and you will be transported to a rest room in the Great Shaft where you can read the last words of Dr Watson.
Pick up the page which adds a music player to your Relto. Read the journal and head outside. All that is left to do is get to the bottom of the shaft. You can walk or jump, the result is the same...
THE END
New Riven Firmament Obduction Scratches Myst Myst II: Riven Myst III: Exile Myst IV: Revelation Myst V: End of Ages Uru - Ages Beyond Myst Uru - To D'ni Uru - Path of the Shell Dark Fall - The Journal Dark Fall - Light's Out Rhem Rhem 2 - The Cave Rhem 3 - The Secret Library Reah Schizm Riddle of the Sphinx The Omega Stone Amerzone Zork - Nemesis Zork Grand Inquisitor Hype - Time Quest
If you have found this walkthrough useful, discovered an error or have a suggestion then let me know: feedback.
![]()
